Design a mug for POD, the 11oz classic mug
It’s the size most people picture when they think of a coffee mug, and it’s also the most popular option offered by POD providers.
Designing for it is straightforward, but there are a few technical details that will help you make the best-looking product possible.
Create your design
I personally use the program Inkscape which is Freeware. The reason I do this is because I use a bunch of international alphabets. Others use Canva or Edit.org or I’ve even read of people using PowerPoint.
Prodigi has a guide to the printable space at the very bottom of its page (and this one).
Gelato also has a guide.
It seems deliberately hard to find the specs but I provide my research here.
I’ll update as I learn more.

The printing area differs depending on the POD provider
While it would seem like the base mugs should be the same and the printing process and facilities similar… the dimensions for the mugs and printing are different between these two providers. I’ll do some research and get back to you on this!
For now, this is what’s on the website
Prodigi
The Prodigi website has the mug dimensions as:
-
229mm x 95mm
It says the printable area is:
- 2670 px x 1110 px
The quality of the image:
- The design needs to be 300 dpi
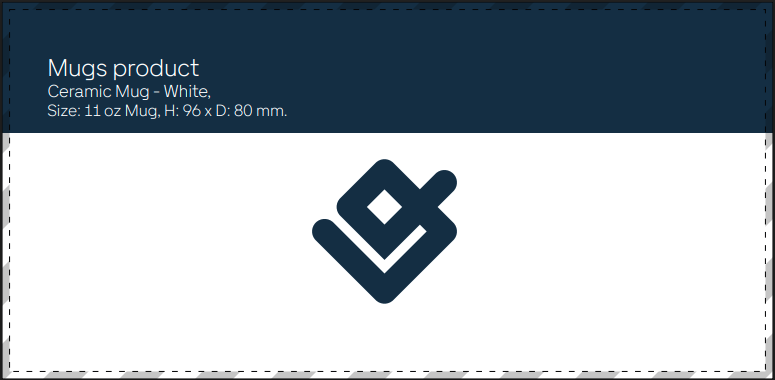
Gelato
The Gelato website doesn’t have the mug dimensions listed.
It says the printable area of a mug is… well it says on one page its 229×95, and the template has different dimensions (see pic above, but that looks like it might just be the white section)
- 200mm x 96mm
- 96mm x 80mm (2/3 image?)
The quality of the image:
- The design needs to be 300 dpi
The Technique: Dye Sublimation
Most POD mugs are printed using dye sublimation. Here’s how it works:
-
Your design is first printed onto a special transfer sheet using sublimation inks.
-
The sheet is hand-placed onto the mug.
-
The mug is then heated in a press. The high temperature turns the ink into gas, which bonds with the mug’s special polymer coating.
The result is a vibrant, permanent print that won’t peel or wash off. Because the sheet is hand-placed, alignment is important: designs placed too close to the edges or handle may not come out perfectly centered. This is why sticking to the recommended template is key and having a trusted printing partner is also advised..
Design Tips
-
Keep it bold: Fine lines or tiny text may be hard to read once curved.
-
Think about orientation: Decide if you want the design visible for left-handed or right-handed users—or wrap it so it works from both sides.
-
Use background colours: Sublimation works best with full-colour designs. A simple background can make your artwork stand out.
-
Avoid edge crowding: Leave some breathing space near the top, bottom, and handle so your design doesn’t look cramped.